MCP Chips Corrector
Notebook name: mcp_chips_corrector.ipynb
Description
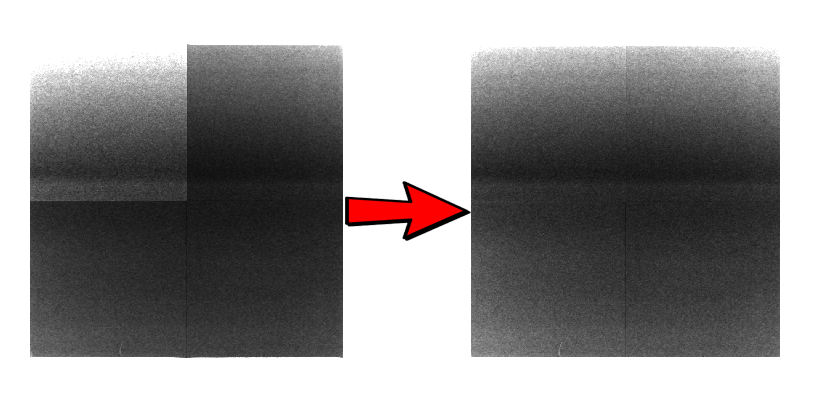
This notebook can perform the following correction:
Start the notebook
If you need help accessing this notebook, check the How To > Start the python notebooks tutorial.
Select your IPTS
Need help using the IPTS selector?
Select Folders to Process
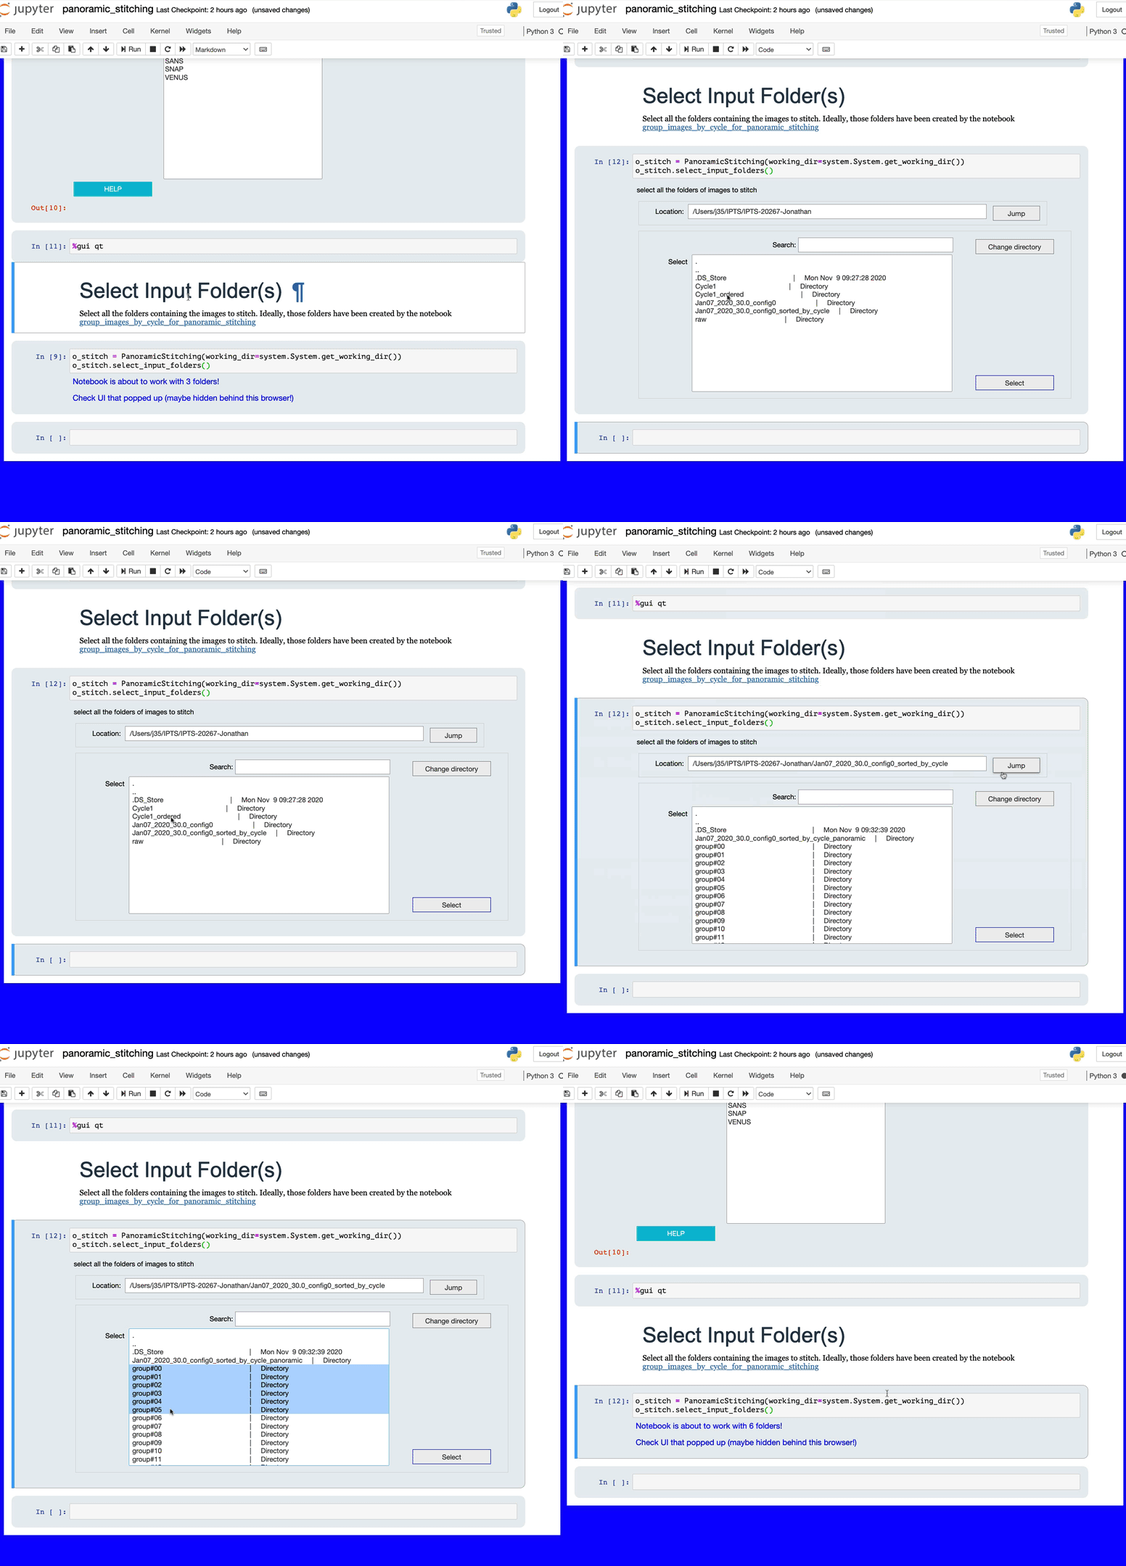
Using the folder selector tool, select the folder you want to work on. This folder must contain the entire FITS images to correct. All the FITS images, except the SummedImg, will be corrected.
Need help using the File Selector?
Interface Presentation
How Does it Work ?
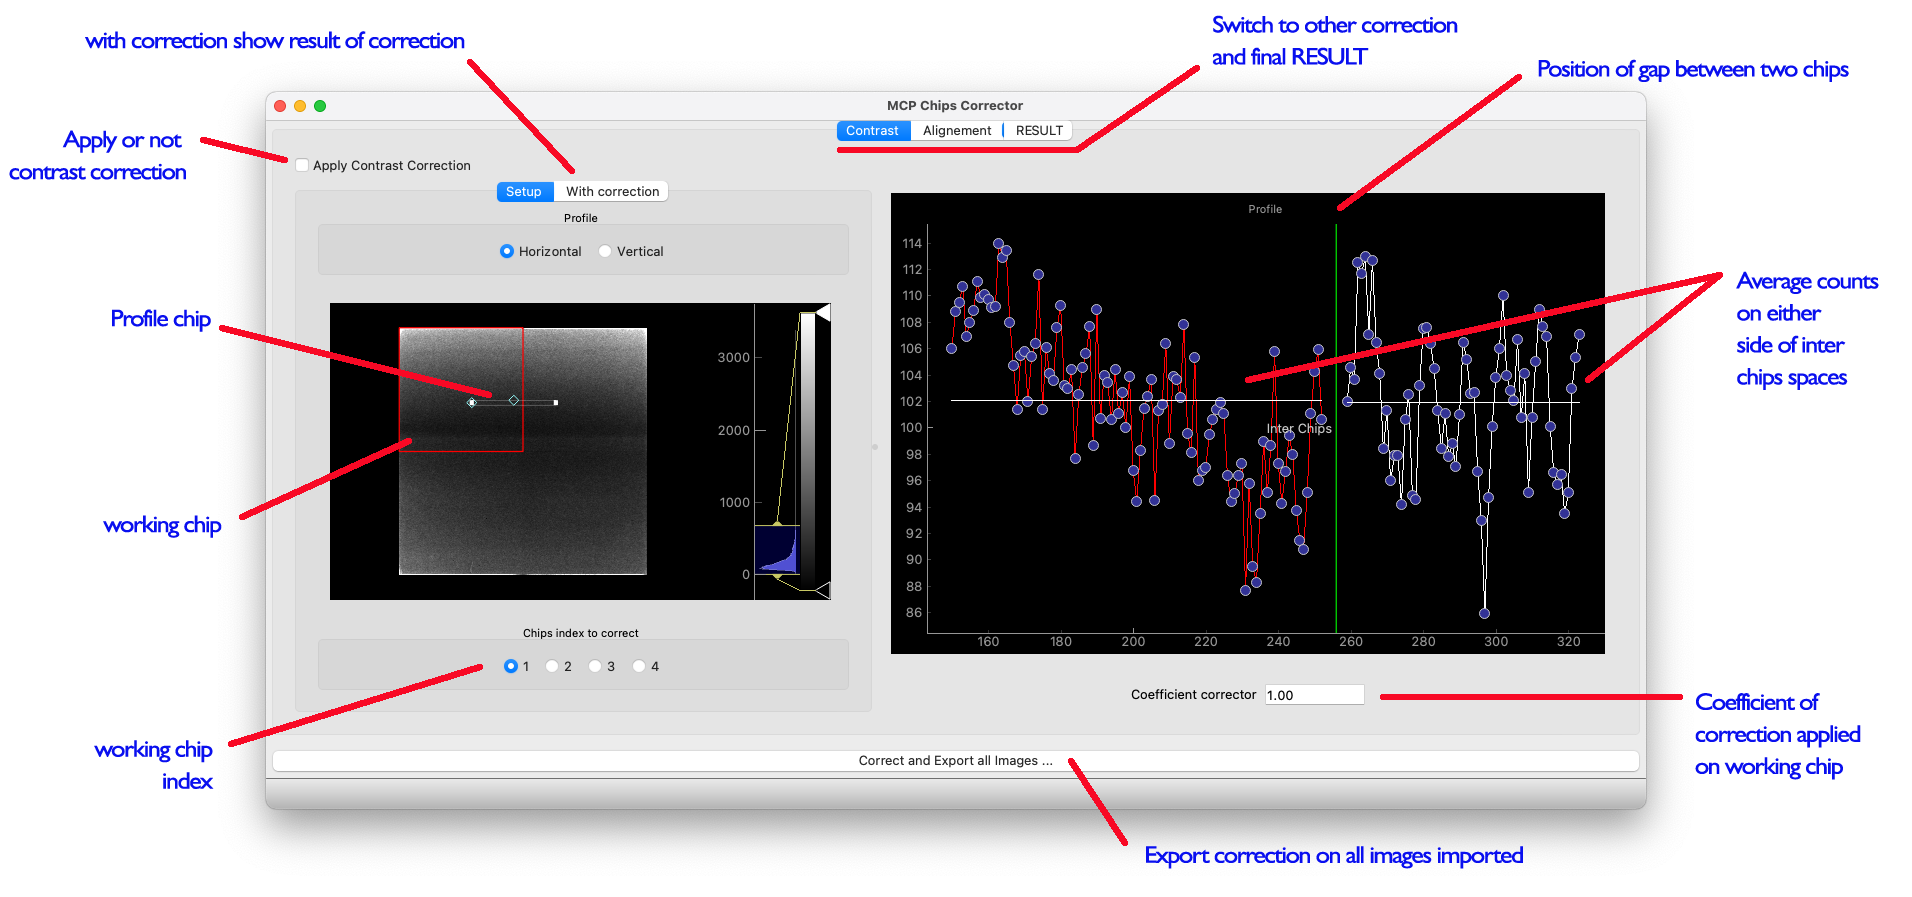
The UI is composed of 3 main tabs. The first tab allows you to apply an offset on any of the chip, the second tab to correct the geometrical gap between the chips and, if you want, fill the gap with interpolated value, and the final tab display the result of those corrections combined into the integrated stack of images selected.
Step by Step
Step 1 - Apply Contrast Correction
If you want to correct the intensity of any of the chips, click the Apply contrast correction check box.
You can correct the intensity of the chips selected in the chips index to correct box in 2 ways:
- manual mode
- automatic mode
Manual mode
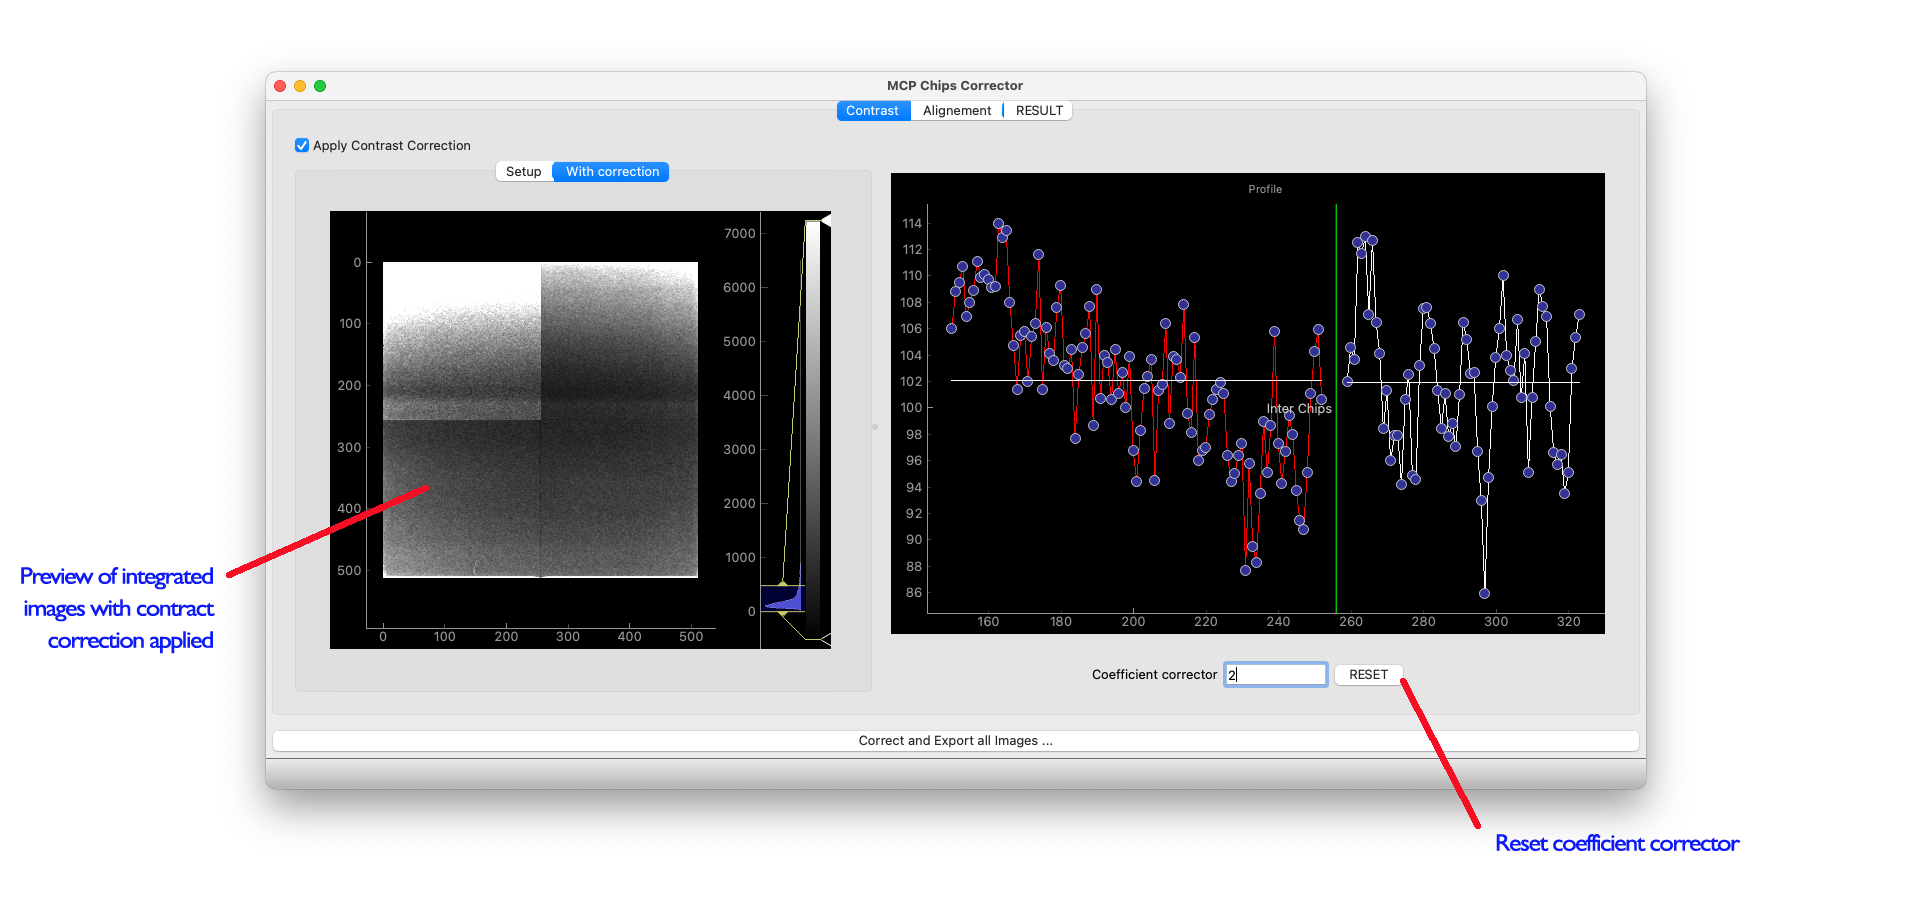
Enter a coefficient corrector value in the field (bottom right) and hit ENTER.
Automatic mode
Use selection box in the left preview to overlap the chip to correct with a chip next to it. The program will automatically match the average intensity of the 2 regions and calculate the coefficient corrector that bring those two values together.
Step 2 - Alignment
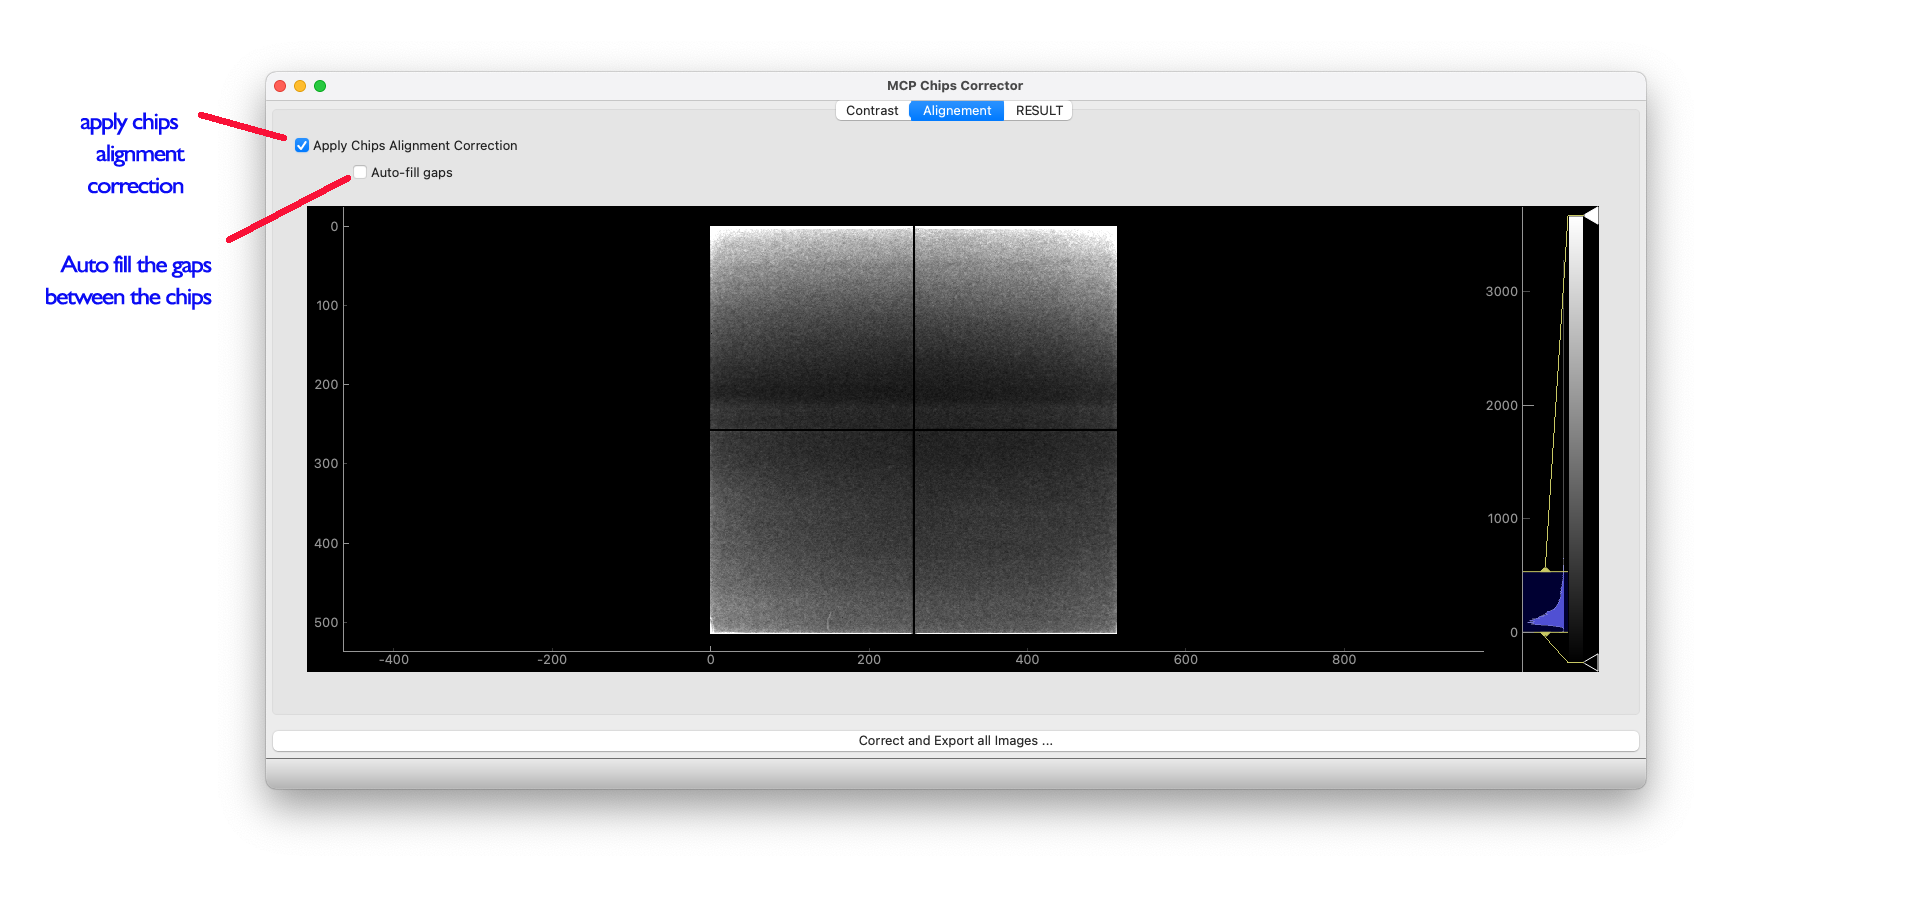
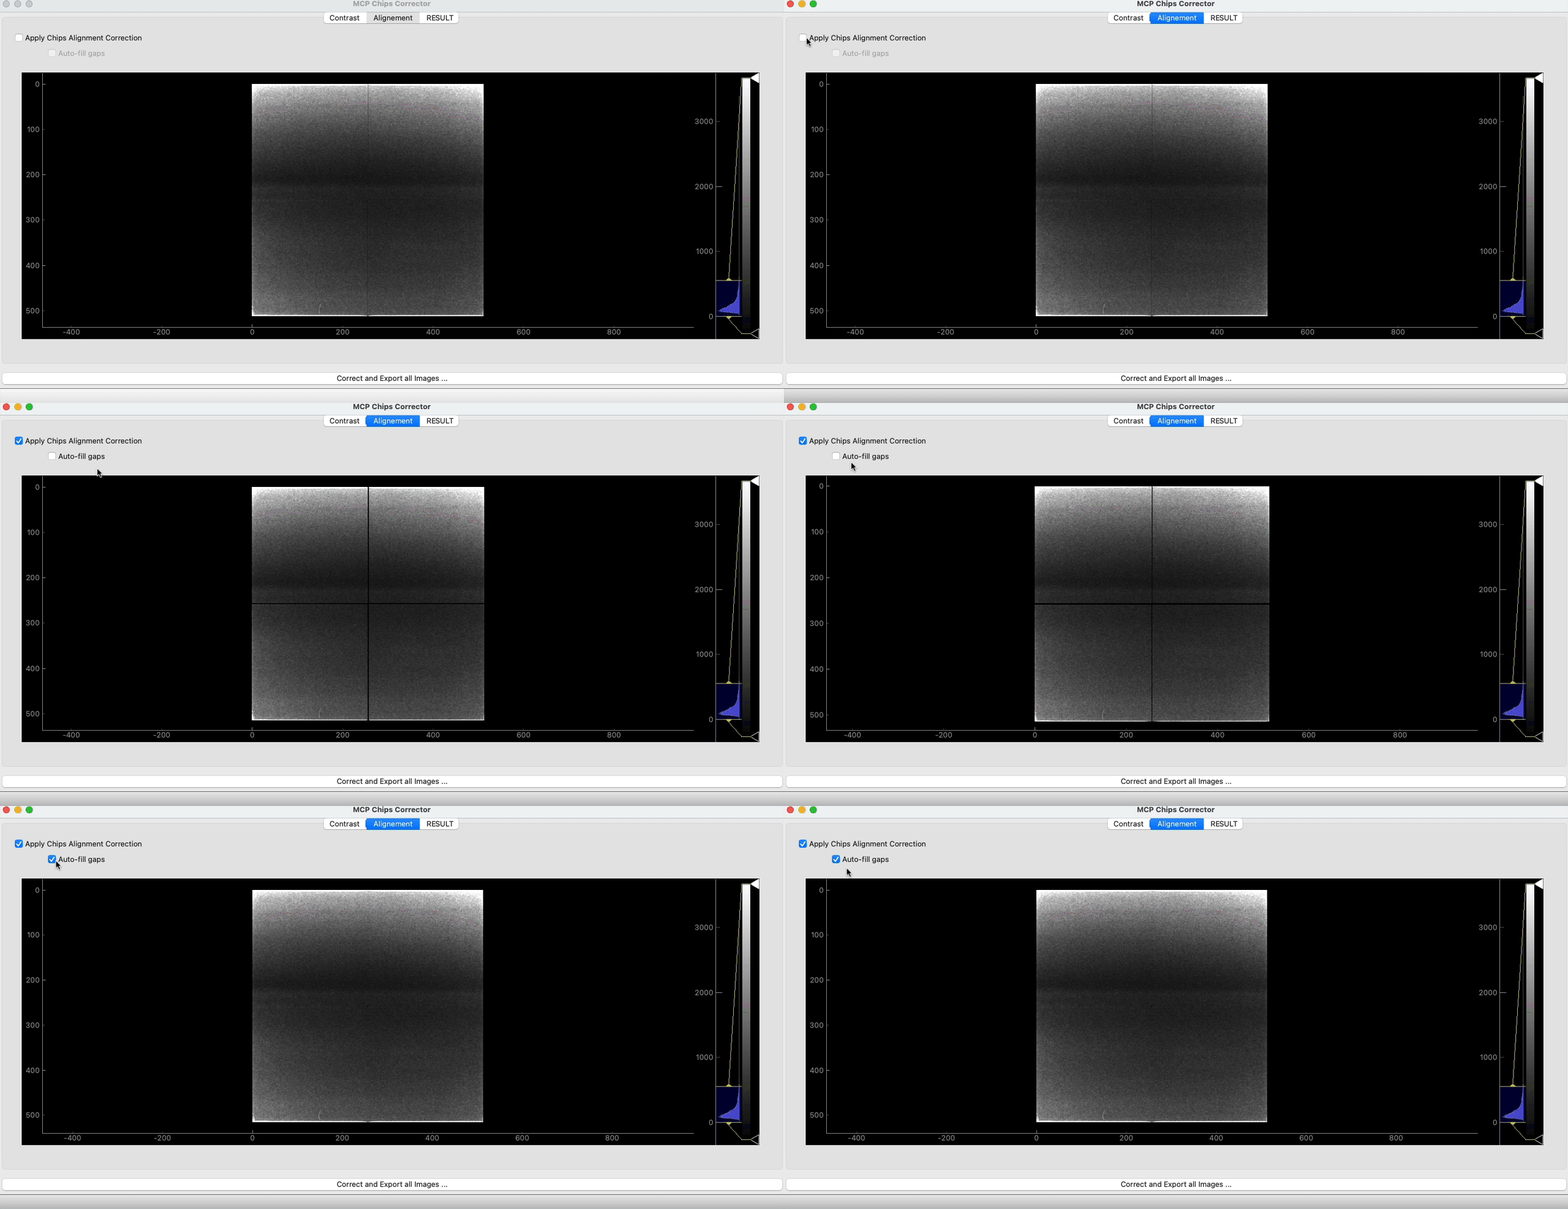
This tab allows to correct the gap between the chips using pre-defined parameters. If you activate the alignment, the right chips will be offset to the right by 2 pixels, and the bottom chips by 3 pixels.
Then if you activate the auto-fill gaps switch, the gap between the chips will be filled by the interpolated pixel intensity on either side of the gap.
Step 3 - RESULT and export
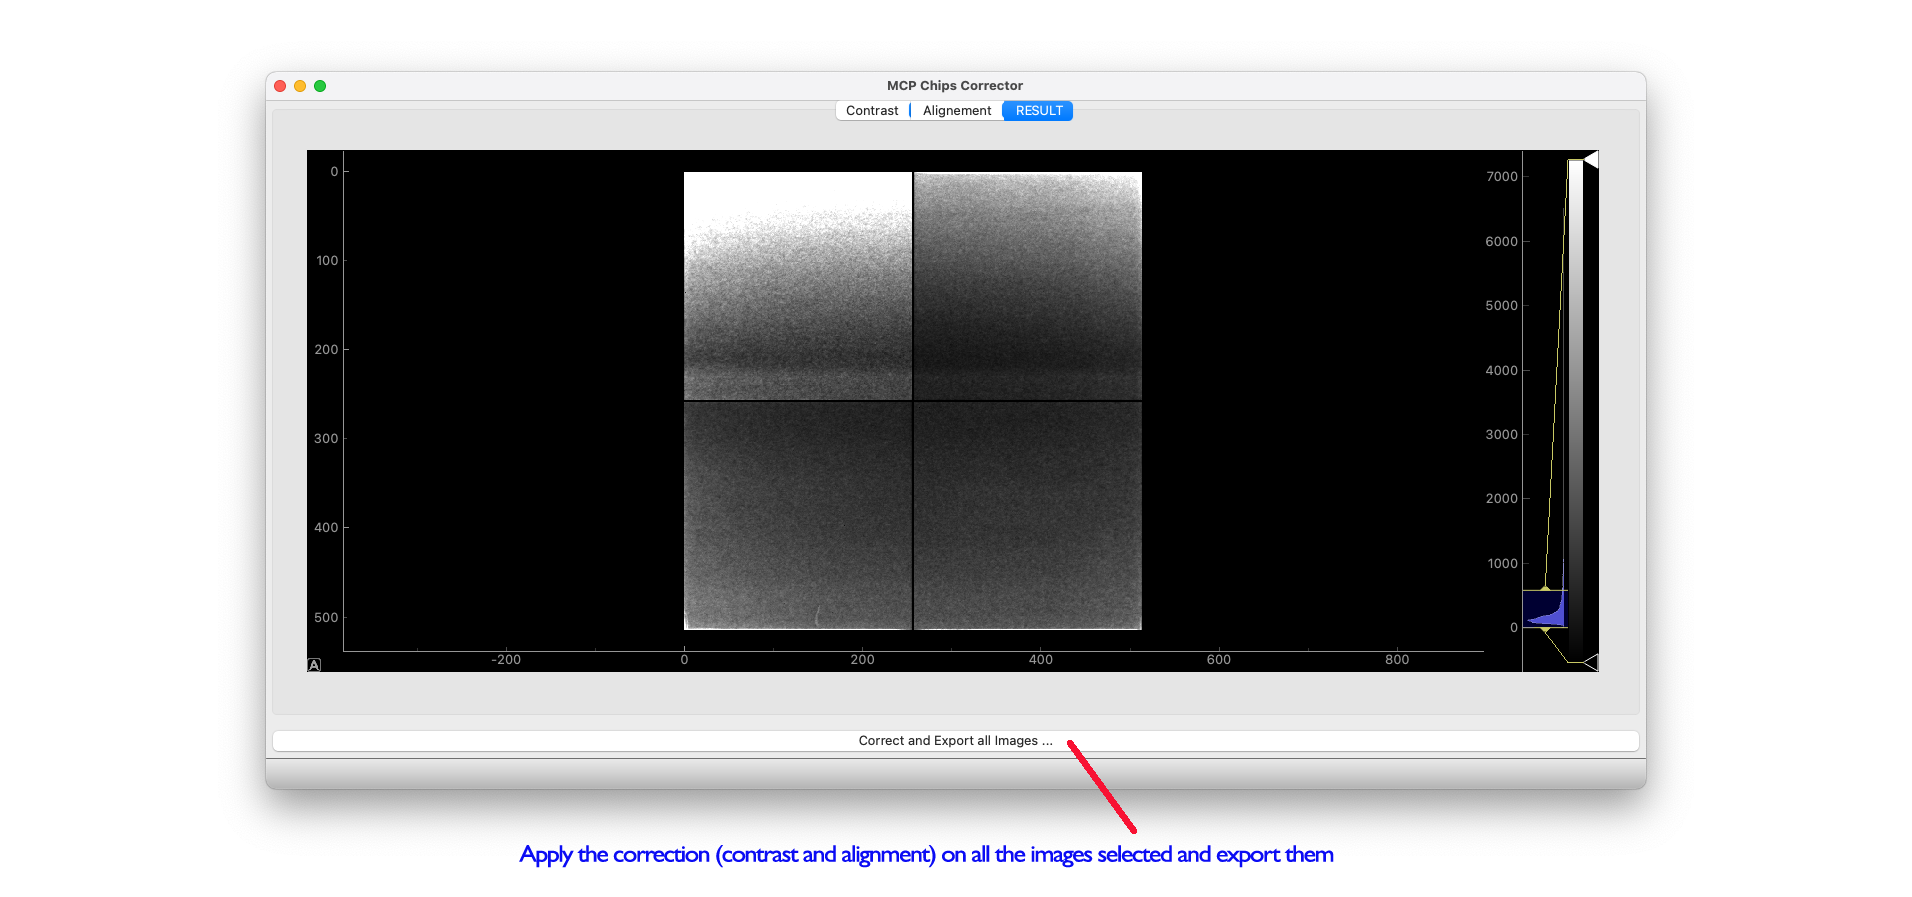
This tab will apply all the selected corrections and display the result on the integrated image.
Click the Correct and Export all Images… to select an output folder and export those images in fits format.
